
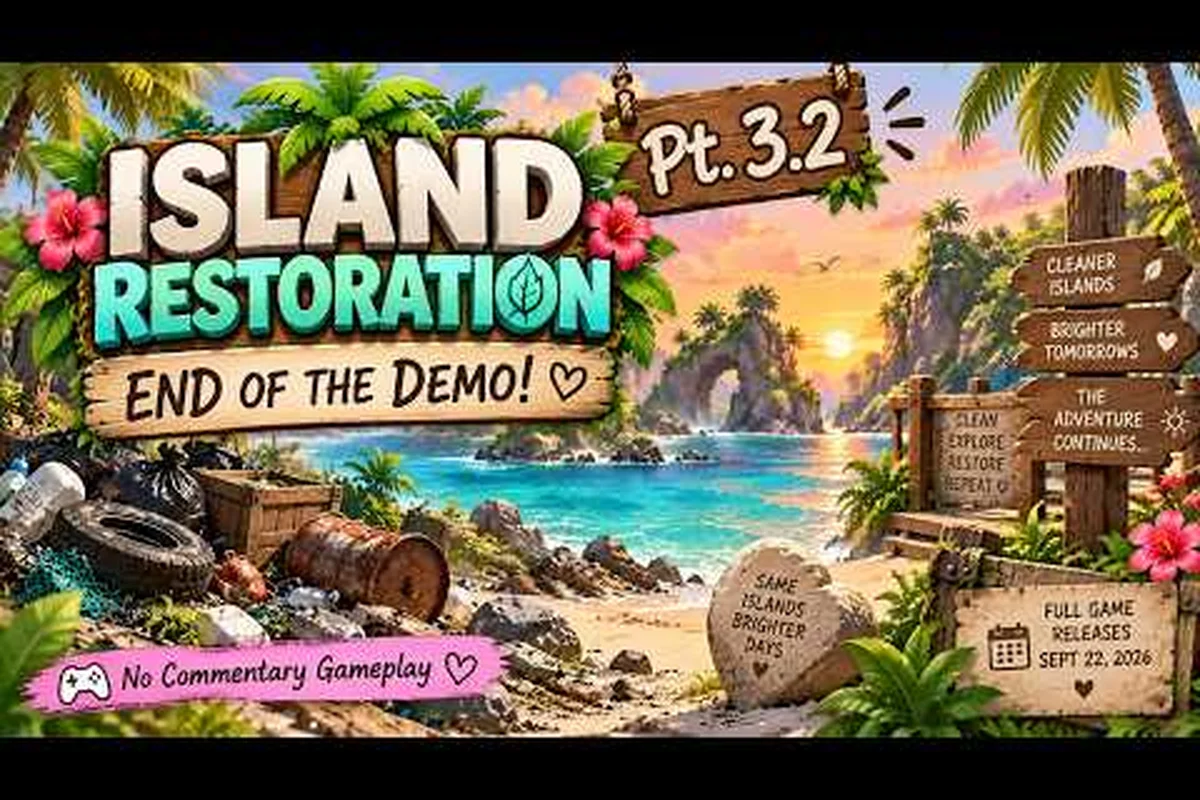
Island Restoration drops you into a sleepy harbor and asks one simple question: how do you turn twelve wrecked maps back into living habitats? The answer lives inside a tight loop of sailing, cleaning, rescuing animals, and spending earned currency on a skill tree that quietly multiplies your efficiency. This Island Restoration how to progress walkthrough breaks down every gameplay mode the solo developer shipped, the full control set across keyboard, mouse, and controller, and the fastest route from your first oil stain to the final biome so you never stall in the Tropical Isles.
The game launches September 23, 2026 on Steam for $9.99 with a 10% launch discount during the first two weeks, and the demo already gives new captains a taste of the core loop with a few upgrades pre-unlocked. Whether you came in through the demo or you are about to buy on day one, the systems below all funnel into one repeatable rhythm: clean, earn, upgrade, repeat. Once that rhythm clicks, the rest of the game reads itself.
Understanding Every Gameplay Mode in Island Restoration
Cleaning damaged islands sounds like a single-mode job, but Island Restoration actually layers three distinct gameplay modes on top of the same core tools. According to the official Steam page, the full release ships with 4 biomes across 12 maps, 6 unlockable cleaning tools, a full upgrade skill tree, and a built-in randomizer that breathes new life into replays. Each mode below pulls from that toolkit but asks for a different mindset.
Story Mode: The Main Restoration Campaign
Story Mode is where most new captains start, and it is the linear path the developer used to teach every system. You begin in the Tropical Isles with your boat, the pressure washer, and a starter set of nozzles. Each map presents a pollution problem (oil spills, garbage piles, overgrown vines, or mud) plus a roster of distressed animals that need rescuing before you can claim the island clean.
Story Mode maps are handcrafted and follow a clear difficulty curve. The first few maps teach one cleaning tool each, then later maps start combining pollution types so you must swap between oil-cleaning, garbage-collection, vine-clearing, and mud-removal modes mid-run. The campaign ends once all four biomes are restored, which doubles as the natural "endgame" checkpoint.
| Story Mode Milestone | Required Action | Reward |
|---|---|---|
| First island cleared | Remove 100% pollution + rescue all animals | Unlock second biome + first skill node |
| Three islands cleared | Hit 100% cleanliness rating | Unlock third cleaning tool |
| First biome complete | Clean every map in the region | Cosmetic boat decal + bonus currency |
| All 12 maps clean | Finish all 4 biomes | Final achievement + New Game+ flag |
Side Contracts Mode: Endless Replayable Jobs
Once the campaign starts opening up, the infinite side contracts system activates. The harbor noticeboard hands you procedurally generated jobs that pull from a shared pool of pollution types and animal rescue objectives. Side contracts are tuned to your current skill level, so early jobs reinforce what Story Mode just taught you, while late-game contracts layer multiple pollution types into tight maps designed to pressure your upgraded tool kit.
Community testing reported by players shows that side contracts pay roughly 15-25% more currency per minute than Story Mode maps of equivalent difficulty, which makes them the fastest farming route once you have a few skill points invested. The built-in randomizer then shuffles the contract pool on every harbor visit, so the jobs never quite repeat.
| Contract Difficulty | Typical Pollution Mix | Avg. Reward | Recommended Build |
|---|---|---|---|
| Easy | Single-type (oil or garbage) | 50-80 currency | Pressure washer + wide nozzle |
| Medium | Two-type (oil + vines) | 90-140 currency | Add skimmer attachment |
| Hard | Three-type + timed animal rescues | 160-220 currency | Pressure washer + boost upgrade |
| Expert | All four pollution types | 250+ currency | Fully maxed skill tree |
Randomizer Mode: Chaos Runs for Replay Value
The built-in randomizer is the third pillar and the one most players underestimate. Activated from the harbor, randomizer mode re-rolls every map in the current biome pool, scrambles pollution layouts, and seeds animal rescue objectives with new constraints. The point is not just chaos; it is mastery. The same skills and tools that finish a handcrafted Story Mode map in five minutes get tested in a randomizer layout where the oil patch sits underneath a vine canopy you cannot see until you cut it back.
If you are serious about the island restoration walkthrough side of progression, run a randomizer contract between every two Story Mode maps. It reinforces the muscle memory for swapping nozzles on the fly and is the best preparation for the hardest side contracts the game can generate.
Island Restoration Controls: Keyboard, Mouse, and Full Controller Support
Before you can progress efficiently, you need to actually pilot the boat and swap tools without thinking. The demo launched with full controller and Steam Deck support, including controller-specific settings and replaced input icons, and the full release carries that support forward. According to official patch notes, hitting ESC exits the nozzle selection wheel so you can step back and survey the map mid-cleanup, which is a small quality-of-life change that saves real seconds on every island.
Keyboard Hotkeys for Tool and Camera Work
Keyboard-to-tool mapping is the fastest input layer for precision cleaning because every tool swap, camera nudge, and animal interaction is bound to a key you can reach without lifting your hand off WASD. With six cleaning tools cycled via Q/E, Tab-driven nozzle selection, and the F key used to rescue map wildlife, the binding layout lets you pivot between oil spills, garbage piles, vines, and mud without ever breaking boat momentum—critical when progressing through an island restoration walkthrough where missed interactions can lower your end-of-level score.
| Action | Default Binding | When You Use It |
|---|---|---|
| Move boat | W / A / S / D | Sailing between islands and across maps |
| Aim cleaning tool | Mouse cursor | Targeting oil spills, garbage, vines, mud |
| Primary fire (clean) | Left mouse button | Holding to scrub pollution |
| Secondary fire (boost) | Right mouse button | Short burst to power through heavy stains |
| Switch tool | Q / E | Cycling through the 6 cleaning tools |
| Nozzle wheel | Tab | Picking a specific nozzle for the current tool |
| Exit nozzle wheel | ESC | Stepping back to read the map |
| Interact with animal | F | Rescuing the cute wildlife scattered per map |
| Clue button | C | Reveals hints for hidden pollution spots |
| Pause / Menu | M | Accessing the skill tree, save, and settings |
Stick, Trigger, and D-Pad Mapping
The controller layout mirrors the keyboard scheme but maps movement to the left stick and aim to the right stick. RT fires the primary cleaning beam, LT triggers the boost, and the D-pad cycles through your six tools in order. The full game supports Steam Deck Verified controls out of the box, and the developer added a dedicated controller settings page so you can rebind anything that does not sit naturally on your hands.
| Action | Default Binding | When You Use It |
|---|---|---|
| Move boat | Left stick | Sailing and precise in-harbor navigation |
| Aim cleaning tool | Right stick | Targeting pollution and animals |
| Primary fire | RT | Continuous cleaning beam |
| Boost / secondary | LT | Short power burst for thick stains |
| Switch tool | D-pad left / right | Cycling through the 6 cleaning tools |
| Nozzle wheel | Y | Selecting a specific nozzle |
| Exit nozzle wheel | B | Returning to the main view |
| Interact / rescue | A | Picking up distressed wildlife |
| Clue button | X | Reveals hidden pollution locations |
| Pause / Menu | Start | Skill tree, save, settings |
The Clue Button and Save Anytime System
Two control-layer features deserve their own callout because they are progression shortcuts, not just convenience tools. The clue button (C on keyboard, X on controller) pulses the camera to highlight any pollution spot or hidden animal you have not yet dealt with, which prevents the most common new-player stall: missing 2% garbage and wondering why the map refuses to clear.
The Save Anytime system works the moment you pause, so you can drop a save on every island without hunting for a save point. That makes experimentation cheap; if a new skill node turns out to be a dead end for your build, reload and refund it. For a deeper look at how those systems interact with camera angles, the camera controls and save system guide covers the full input layer in detail.
The Fastest Progression Path: From Tropical Isles to Full Restoration
The fastest way through Island Restoration is to chain the three modes together instead of grinding one in isolation. Skill points matter more than raw currency because the skill tree is a multiplier on every future run, so the goal is to unlock the highest-leverage nodes as quickly as possible and then farm side contracts to fund the rest.
Phase 1: Clean Tropical Isles and Bank Your First Points
Spend your first session clearing the demo's Tropical Isles region. The demo shipped with a few upgrades already unlocked so you can feel the core loop without a slow ramp, and that hand-holding is useful for mapping out which cleaning tool you gravitate toward. Most captains fall into one of two camps: pressure-washer mains who like the raw speed of high-pressure cleaning, and skimmer mains who prefer the steady pace of vacuum-style garbage collection.
| Phase 1 Goal | Recommended Tool | Skill Node Priority |
|---|---|---|
| Clear Tropical Isles map 1 | Pressure washer + wide nozzle | Boost recharge speed |
| Clear Tropical Isles map 2 | Add skimmer attachment | Animal rescue speed |
| Clear Tropical Isles map 3 | Pressure washer + narrow nozzle | Tool swap cooldown |
| Finish the biome | All six tools unlocked | Unlock second biome access |
Phase 2: Hit the Harbor and Start Side Contracts
Once Tropical Isles is complete, the harbor opens up and the side contracts board lights up. This is where the fastest route actually accelerates. Each contract takes about 5-10 minutes depending on difficulty, and the randomized pollution layouts train your tool-swapping reflexes for the harder biomes ahead.
| Contract Tier | Skill Level | Avg. Currency | Skill Node Target |
|---|---|---|---|
| Easy contracts | Levels 1-5 | 50-80 each | Boost + swap speed |
| Medium contracts | Levels 6-12 | 90-140 each | Range extension + nozzle efficiency |
| Hard contracts | Levels 13-20 | 160-220 each | Animal rescue bonus + combo multiplier |
| Expert contracts | Levels 21+ | 250+ each | Endgame synergy nodes |
For a full breakdown of every biome's map pool and which contracts farm the best currency, the Island Restoration all maps breakdown lists every island by region, including drop-rate tables, harbor reward tiers, and recommended tool loadouts for the Coral, Volcanic, and Tundra biomes unlocked after Tropical Isles — making it the natural next step once your side-contract currency starts stacking.
Phase 3: Skill Tree Optimization and Biome Order
The skill tree is the single biggest progression lever in the game, and the order you invest points in matters more than the total. The community-reported optimal path invests early points in boost recharge speed and animal rescue speed, because both pay back during every single map you clean. Damage and range nodes feel good but become redundant once you are swapping tools every few seconds.
| Skill Tier | First Node to Unlock | Why It Wins |
|---|---|---|
| Tier 1 (cost 100) | Boost recharge speed | Used on every pollution type |
| Tier 2 (cost 250) | Animal rescue speed | Adds currency bonus on every map |
| Tier 3 (cost 500) | Tool swap cooldown | Multiplies effectiveness in mixed maps |
| Tier 4 (cost 1000) | Nozzle efficiency | Late-game expert contracts demand it |
| Tier 5 (cost 2000) | Endgame synergy | Unlocks the randomizer mastery bonuses |
For a deep dive into the four biomes, their pollution profiles, and which skill nodes map best to each region's challenges, the Island Restoration biome guide covers the full progression order across all four regions.
Advanced Progression: Randomizer Mastery and Animal Rescue Strategy
Once the campaign is rolling, the difference between a casual captain and a fast-restoration specialist comes down to how they pre-seed both the randomizer and the animal rescue layer before each island enters the active loop. Specialists chart which biomes favor the Overtime Mode modifier, memorize the five-animal cap per habitat, and queue rescue cages so a single habitat clear chains into the next without idle downtime — preparation that directly converts the 2x restoration multiplier into measurable star gains per session.
Randomizer Runs as a Training Tool
The randomizer is the most underused progression accelerator because players assume it is a "post-game" mode. In practice, running one or two randomizer contracts per session is the fastest way to internalize tool swapping, because the pollution layouts never match what you just memorized on a Story Mode map. Community testing reported by players suggests captains who run regular randomizer contracts clear their first hard-tier side contract roughly 30-40% faster than captains who only play handcrafted maps.
Pair randomizer runs with the clue button sparingly. The clue pulse is free, but if you lean on it every map you never build the spatial awareness that makes expert contracts feel easy. A good rule of thumb: use the clue button twice per map maximum, and only when you have already cleaned 80% of the visible pollution.
Animal Rescue Layer as a Currency Multiplier
Every map in Island Restoration has at least one distressed animal hidden somewhere in the pollution. Rescuing them is not just a feel-good moment; it pays out a flat currency bonus on top of the cleanup reward, and the animal rescue speed skill node multiplies that bonus. The demo introduced the new rescue and help-animals mechanic that the full release expands, so the fastest progression path always treats animal rescue as a primary objective, not a side task.
| Rescue Scenario | Bonus Currency | Skill Multiplier |
|---|---|---|
| One animal rescued | +25 | 1.0x baseline |
| Three animals rescued | +90 | 1.2x with rescue speed node |
| All animals on a map | +200 | 1.5x with rescue speed + synergy nodes |
| Expert contract full clear | +400+ | Up to 2.0x at max build |
Beyond the flat currency math in the table above, the Island Restoration cute wildlife catalog breaks down every species' preferred spawn biome, behavioral cues (like fleeing from pollution clouds or approaching the player when a rescue whistle is active), and the exact trigger conditions that unlock a rescue interaction — critical intel for speedrunners chasing the Expert contract full-clear tier, since missing a single hidden animal on later biomes (volcanic ridge, sunken pier) can drop your bonus from +400 to +90.
Cosmetic Progression and Long-Term Goals
Once the skill tree is funded and the four biomes are clean, the long-term progression loop opens up. The full release ships with boat cosmetic customization, Steam Achievements, and the built-in randomizer as the endgame carrot. None of these are required to "finish" Island Restoration, but they are the reason the game keeps pulling you back after the campaign ends.
Boat Cosmetics and Harbor Decoration
Cleaning every map in a biome unlocks a unique cosmetic for your boat, and the harbor respects that customization the moment you sail in. Cosmetics do not affect performance, but the randomizer mode flags your boat as a "master captain" build, which is a small flex that the community has been chasing since the demo.
| Cosmetic Source | Unlock Condition | Visual Effect |
|---|---|---|
| Tropical Isles master | Clear all Tropical Isles maps | Palm-leaf sail decal |
| Second biome master | Clear all maps in region 2 | Coral paint job |
| Third biome master | Clear all maps in region 3 | Frosted wood trim |
| Final biome master | Clear all 12 maps | Golden anchor figurehead |
| Randomizer completionist | 25 randomizer contracts | Rainbow wake trail |
Achievement Hunting and Steam Integration
The full release ships with Steam Achievements for every milestone: first island cleared, all four biomes restored, every animal rescued, randomizer mastery, and a handful of secret ones tied to specific cleanup sequences. If you want a complete checklist, the Island Restoration achievement list breaks down every unlock condition and the fastest way to hit them in a single save file.
Achievements pop the moment you clear the last pollution spot, which is especially satisfying when running the randomizer because the game normally punishes risky seed experimentation with permanent save corruption. The Save Anytime system removes that friction entirely: you can reload any earlier auto-state mid-campaign, so chasing randomizer mastery or hunting those secret achievement chains tied to specific cleanup sequences no longer means gambling your entire four-biome restoration run.
Wrapping Up the Fastest Route Forward
The cleanest path through Island Restoration is shorter than it looks once you understand the three-mode loop. Clean the Tropical Isles by hand to learn every tool, then start farming side contracts in the harbor to bank currency and skill points, then layer randomizer runs on top of that to sharpen your tool swapping before tackling the harder biomes. The skill tree carries every decision you make, so invest in boost recharge, animal rescue speed, and tool swap cooldown first; the damage and range nodes feel like upgrades but are actually late-game luxuries.
The official Island Restoration page on Steam confirms the September 23, 2026 launch at $9.99 with the launch discount running for the first two weeks, and the demo is still available if you want to practice the Tropical Isles loop before day one. The official gameplay trailer gives a quick visual on every cleaning tool and animal interaction, which is useful for mapping out which build you want to commit to before the campaign starts asking for skill point decisions.
Stick to the rhythm of clean, earn, upgrade, repeat and the twelve maps across four biomes clear faster than the difficulty curve suggests. Once every animal is rescued and every skill node is unlocked, the randomizer keeps the loop alive for as long as you want to sail.
Frequently Asked Questions
What is the fastest way to progress in Island Restoration?
The fastest path chains Story Mode islands with side contracts from the harbor board. Clear Tropical Isles to unlock the skill tree, then run medium and hard contracts to bank currency while you invest early points in boost recharge speed and animal rescue speed. Layer a randomizer run between every two Story Mode maps to keep your tool swapping sharp.
What gameplay modes are in Island Restoration?
Island Restoration ships with three core modes: Story Mode for the handcrafted 12-map campaign across 4 biomes, Side Contracts for the infinite procedurally generated jobs at the harbor, and Randomizer Mode which scrambles every map layout and pollution type for replay mastery. Each mode uses the same six cleaning tools but rewards different skills.
Does Island Restoration support controllers and Steam Deck?
Yes, full controller support and Steam Deck Verified controls ship with the release. The left stick moves the boat, the right stick aims your cleaning tool, RT fires the primary beam, LT triggers the boost, and the D-pad cycles through tools. A dedicated controller settings page lets you rebind anything that does not sit naturally on your hands.
How long does it take to fully progress through Island Restoration?
A focused captain can clear all 12 maps and finish the campaign in roughly 12-18 hours. Filling out the full skill tree, completing every side contract tier, rescuing all wildlife, and chasing Steam Achievements pushes the total closer to 30-40 hours. Randomizer mastery extends the loop indefinitely because no two contracts ever seed the same layout.
Can I save my progress at any time in Island Restoration?
Yes, Save Anytime is a first-class feature. The moment you pause, the game writes a save file, so you can drop a save on every island without hunting for a checkpoint. That makes the randomizer safe to experiment with and refunds cheap if a skill node turns out to be a dead end for your build.